Project Creation
Selecting a Workspace#
-
Once your workspace is assigned, it will appear in upper right hand corner. The workspace will have a name like
BioskrybGenomics_RnD. If you need to move to a new workspace, click on the arrow next to the name and a drop down menu of different workspaces will appear. Once you are in the correct workspace, you will be able to create a new project.Note
If you have selected a workspace, you should see all of the projects within that workspace in a table. If you see a message "No projects found", it means that the currently selected workspace is empty.

-
To create a project, first choose the appropriate Resolve technology for your single cell workflow. Here are the different Resolve Technologies that BaseJumper supports for single cell workflow:
Info
ResolveOME: The ResolveOME technology enables for the simultaneous probing of both RNA and DNA from the same individual cell, and it does so in a holistic, comprehensive manner, providing full genomic DNA variant information as well as full mRNA transcript profiling.
ResolveDNA: ResolveDNA amplification, driven by primary template-directed amplification, provides nearly complete amplification coverage of the genome, with robust representation of both alleles and overall uniformity. ResolveDNA thereby eliminates the peaks and valleys of coverage and inadequate coverage associated with previous techniques, boosting the capacity to gain single cell genomic insights critical for understanding both disease and normal biology.
Note
Make sure the BaseJumper version is updated in order to run the most recent version of the pipelines. To do this, press Ctrl + Shift + r and in the lower left corner you will see the version code update or stay the same if it's already up to date.
Creating a Project#
-
Click the New Project button in the upper right of the table below the workspace box.
-
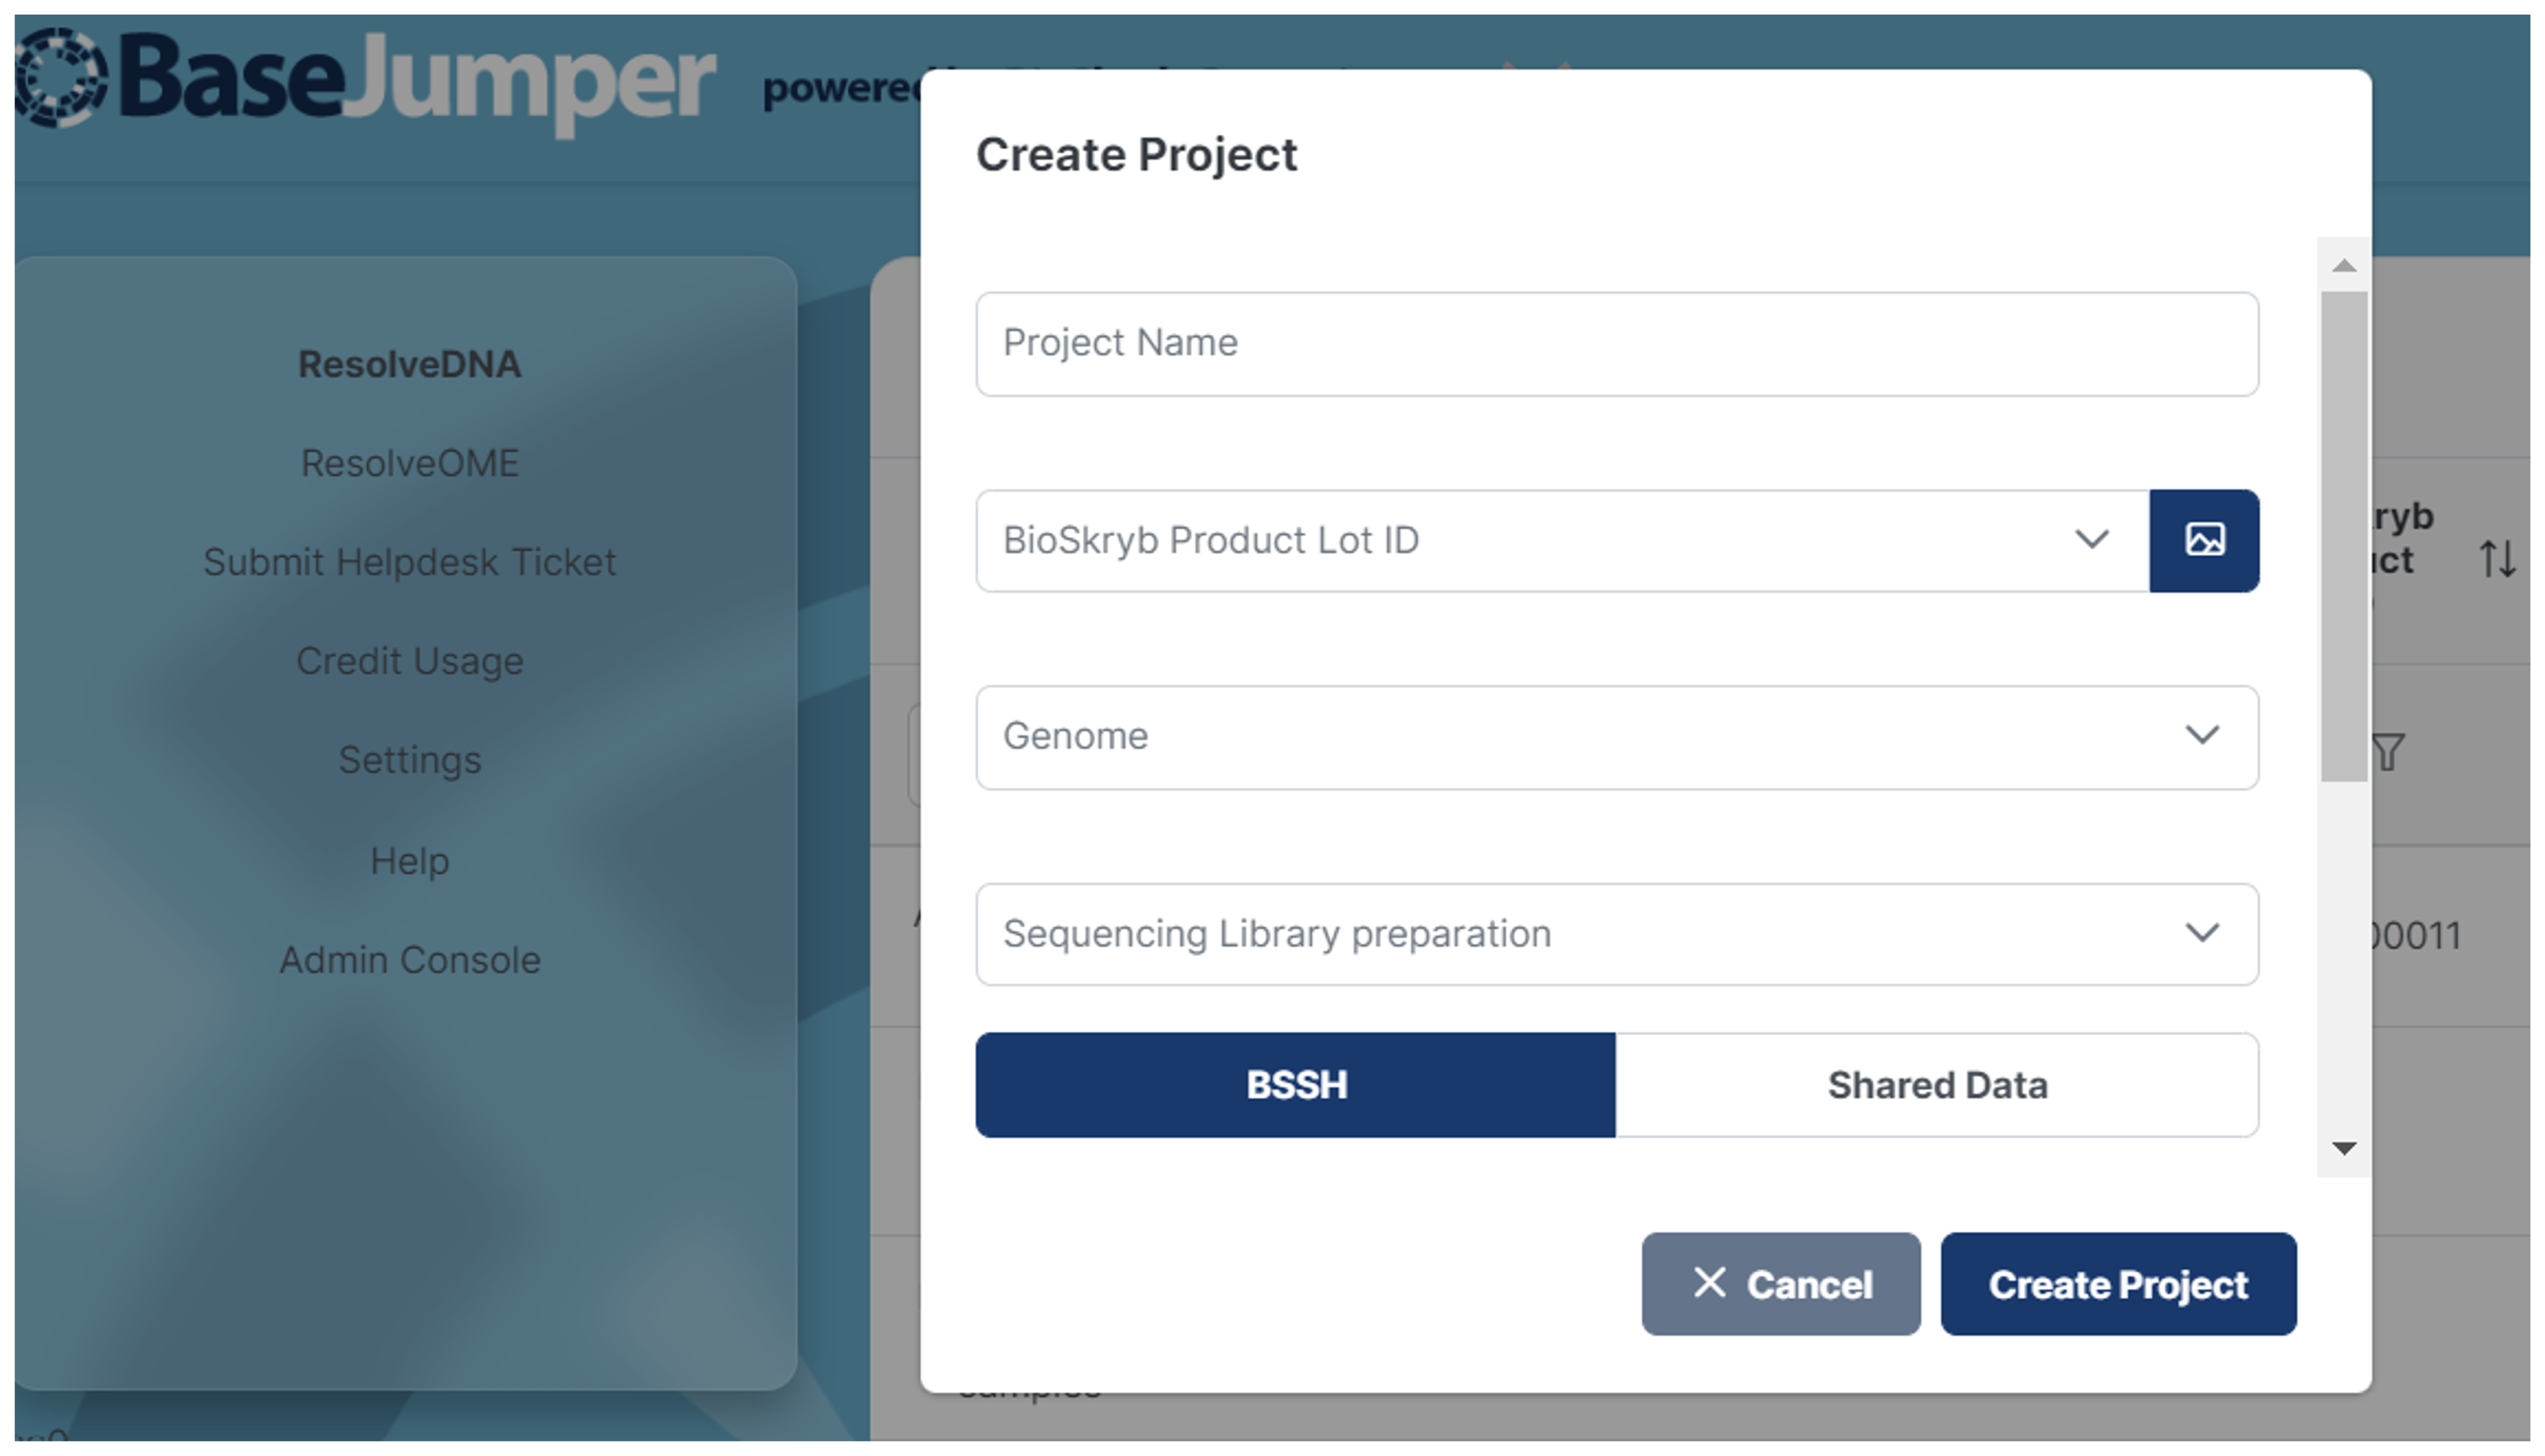
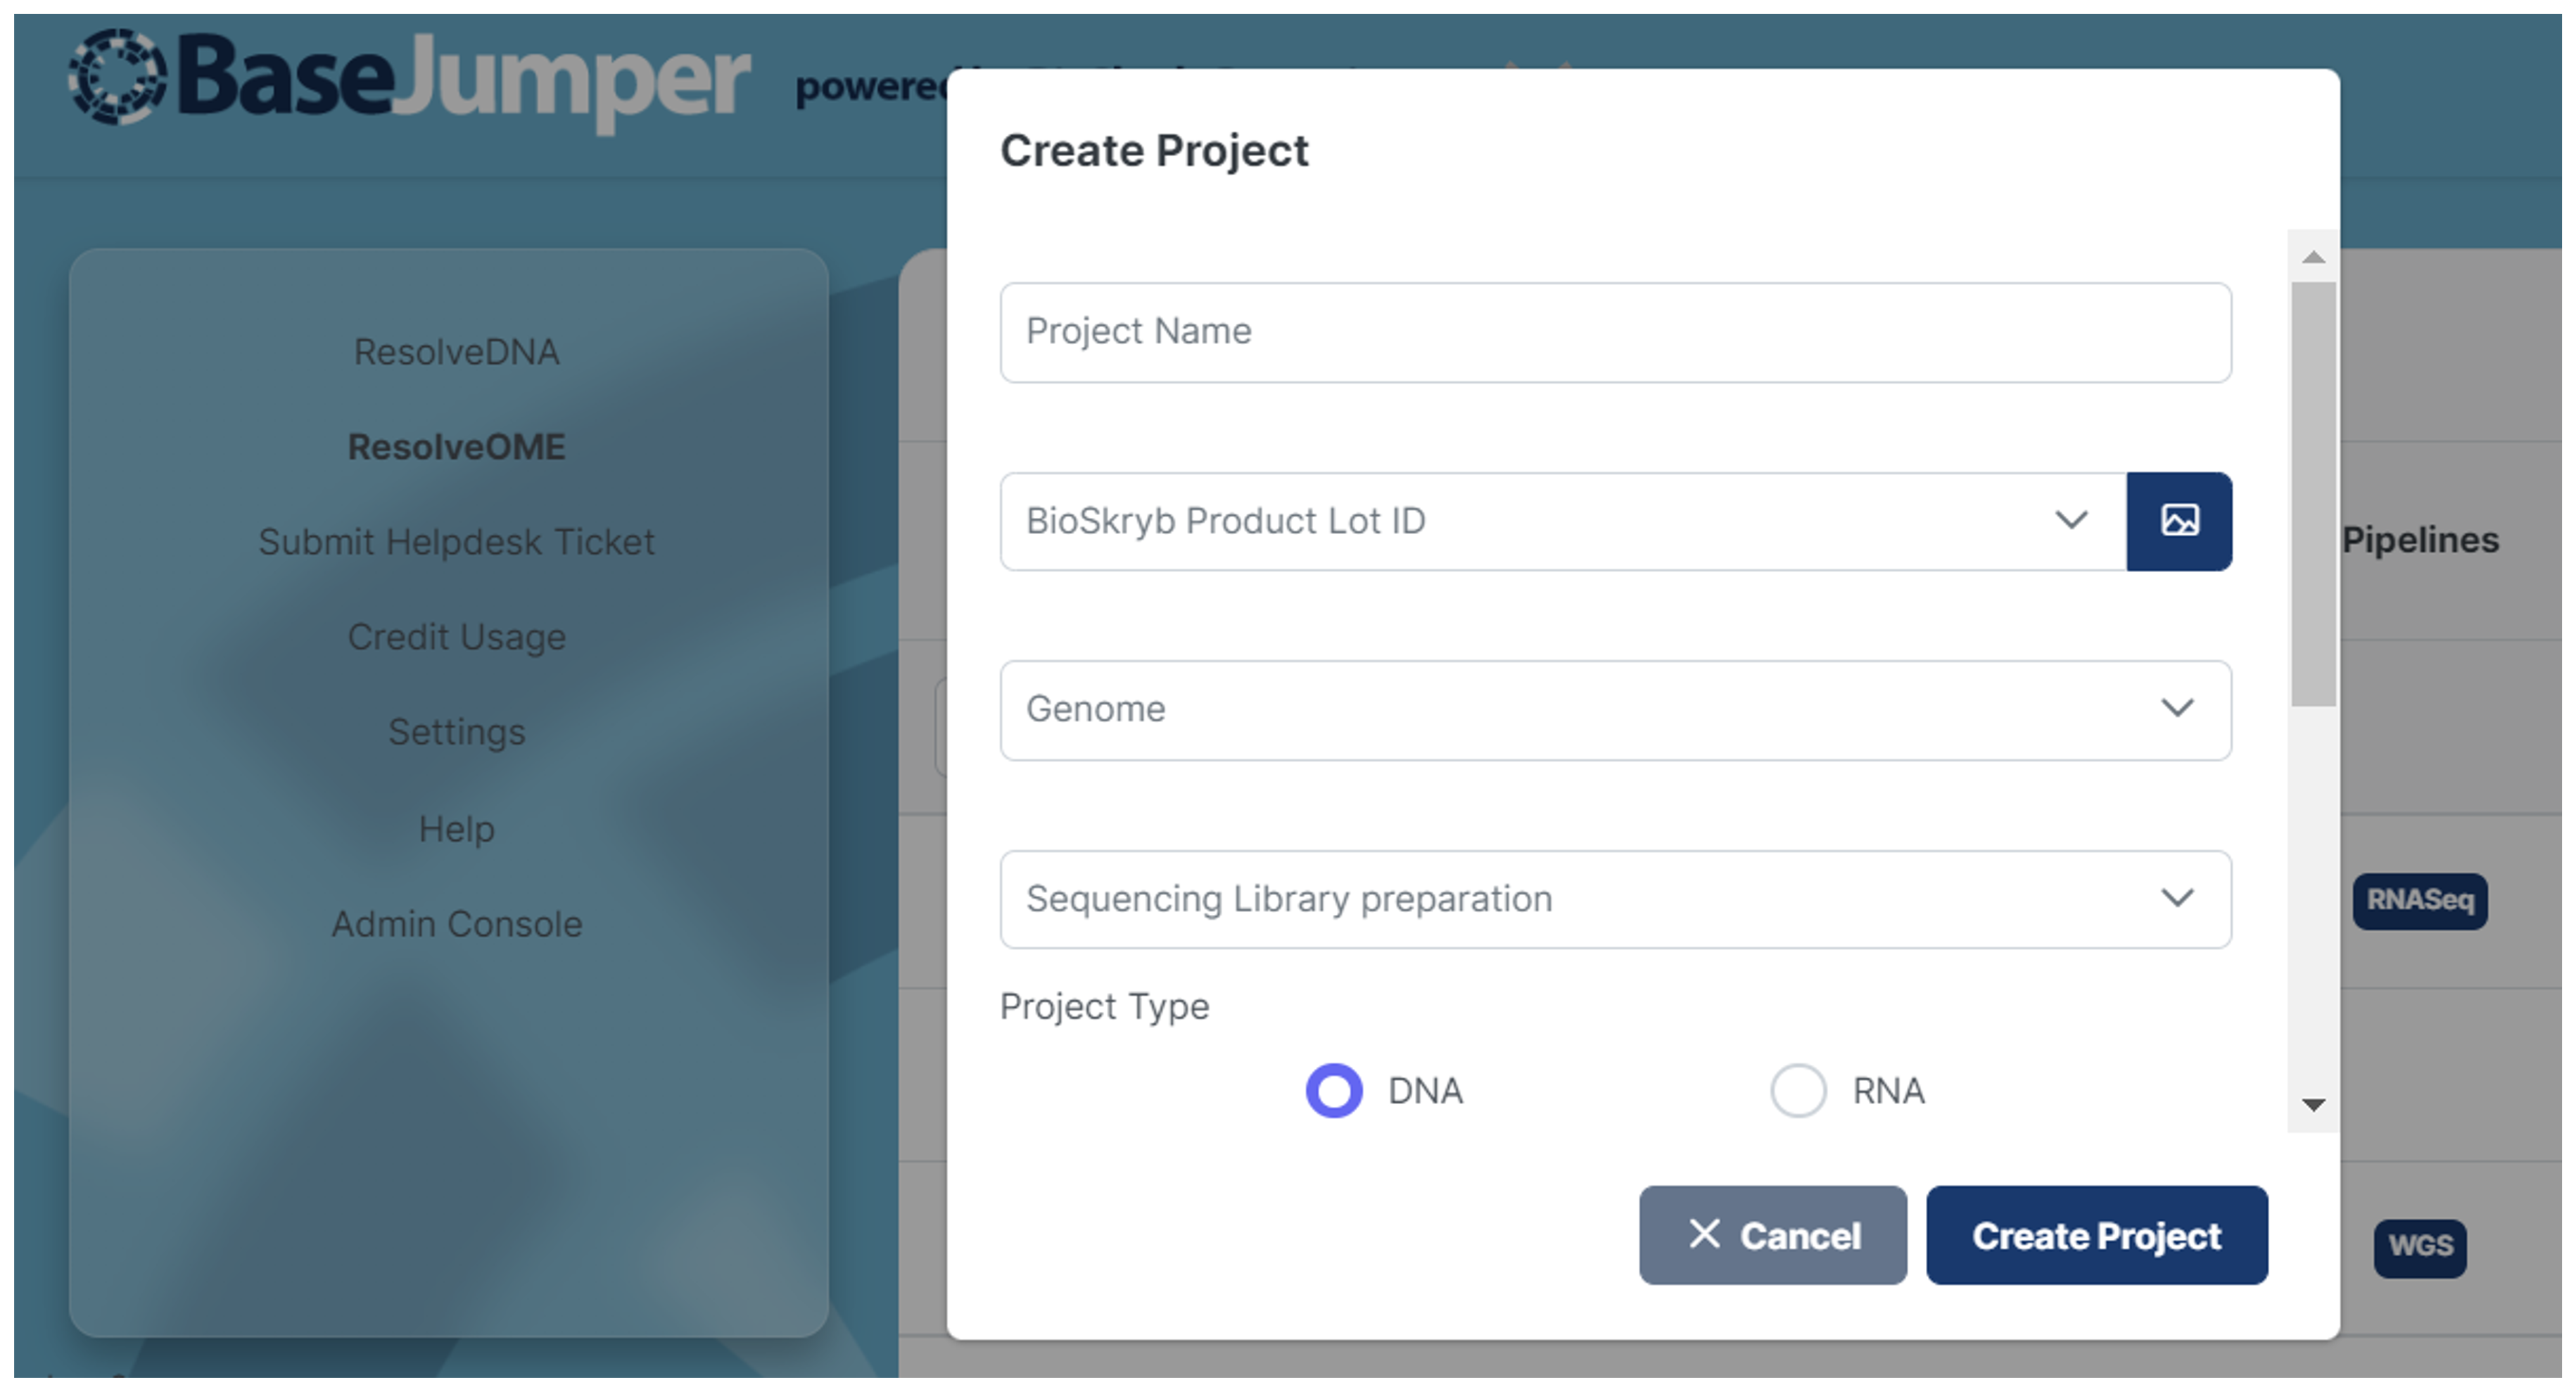
Once selected, a Create Project dialog pops up. If you see a loading spinner wait a few seconds for all of the available biosamples to be loaded from the BaseSpace Sequence Hub and then you can put in the available inputs for your project.

Here are two examples of the different Resolve Technologies. The first example shown below is for ResolveDNA and the second is for ResolveOME. Some of the settings are a little different depending on which Resolve Technology you are using for your project. For example, with ResolveOME, there is a option for DNA or RNA because it includes both the Genome and Transcriptome.
Example - ResolveDNA
Example - ResolveOME
Info
Parameters for Create Project
Project Name - The name of your project. Cannot contain special characters.
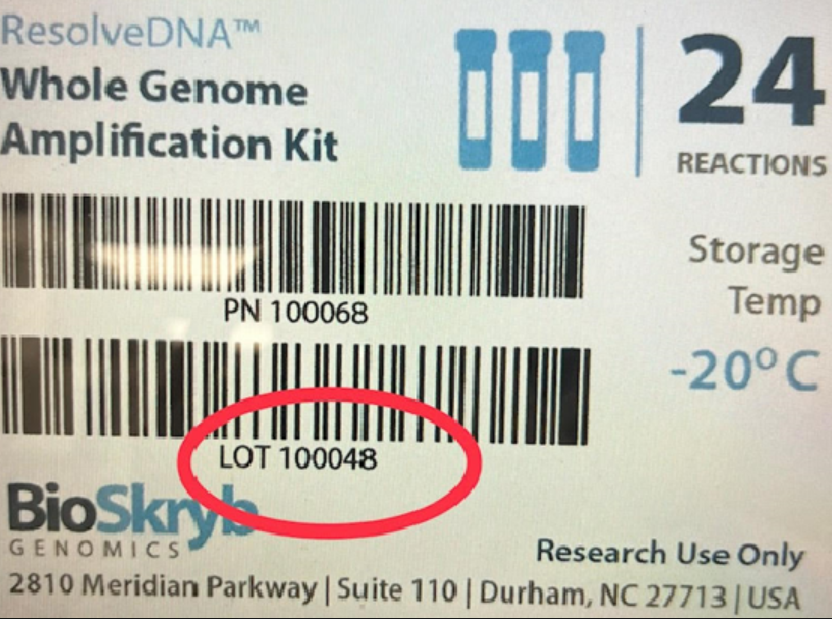
BioSkryb Product Lot Id - The lot number printed on your reagent box. The lot id can be found on the box by clicking the image icon next to the Lot ID section. You will find your lot id on the underside of the box of reagents you got from Bioskryb. Below is a picture to show the exact location.
Genome- Reference Genome
Sequencing Library Preparation - List of all available sequencing types.
BSSH- Base Space Sequence Hub
Shared Data- Data that came from somewhere other than Bases Space Sequence Hub
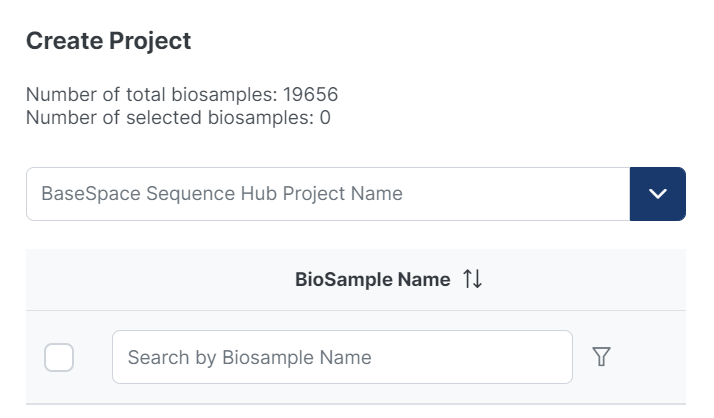
BaseSpace Sequence Hub Project Name - List of all available projects from BaseSpace Sequence Hub. If you select a project (or multiple), only the biosamples belonging to that project will be show in the Biosample Name input field. You have the option to import all the biosamples belonging to that project by clicking the arrow button that will appear on the left of the input field. If you want to see a list of all the samples in that project, scroll down and click on the open expanded biosamples selection view. This will allow you to do another check over your samples incase you need to make any edits before you create your project.
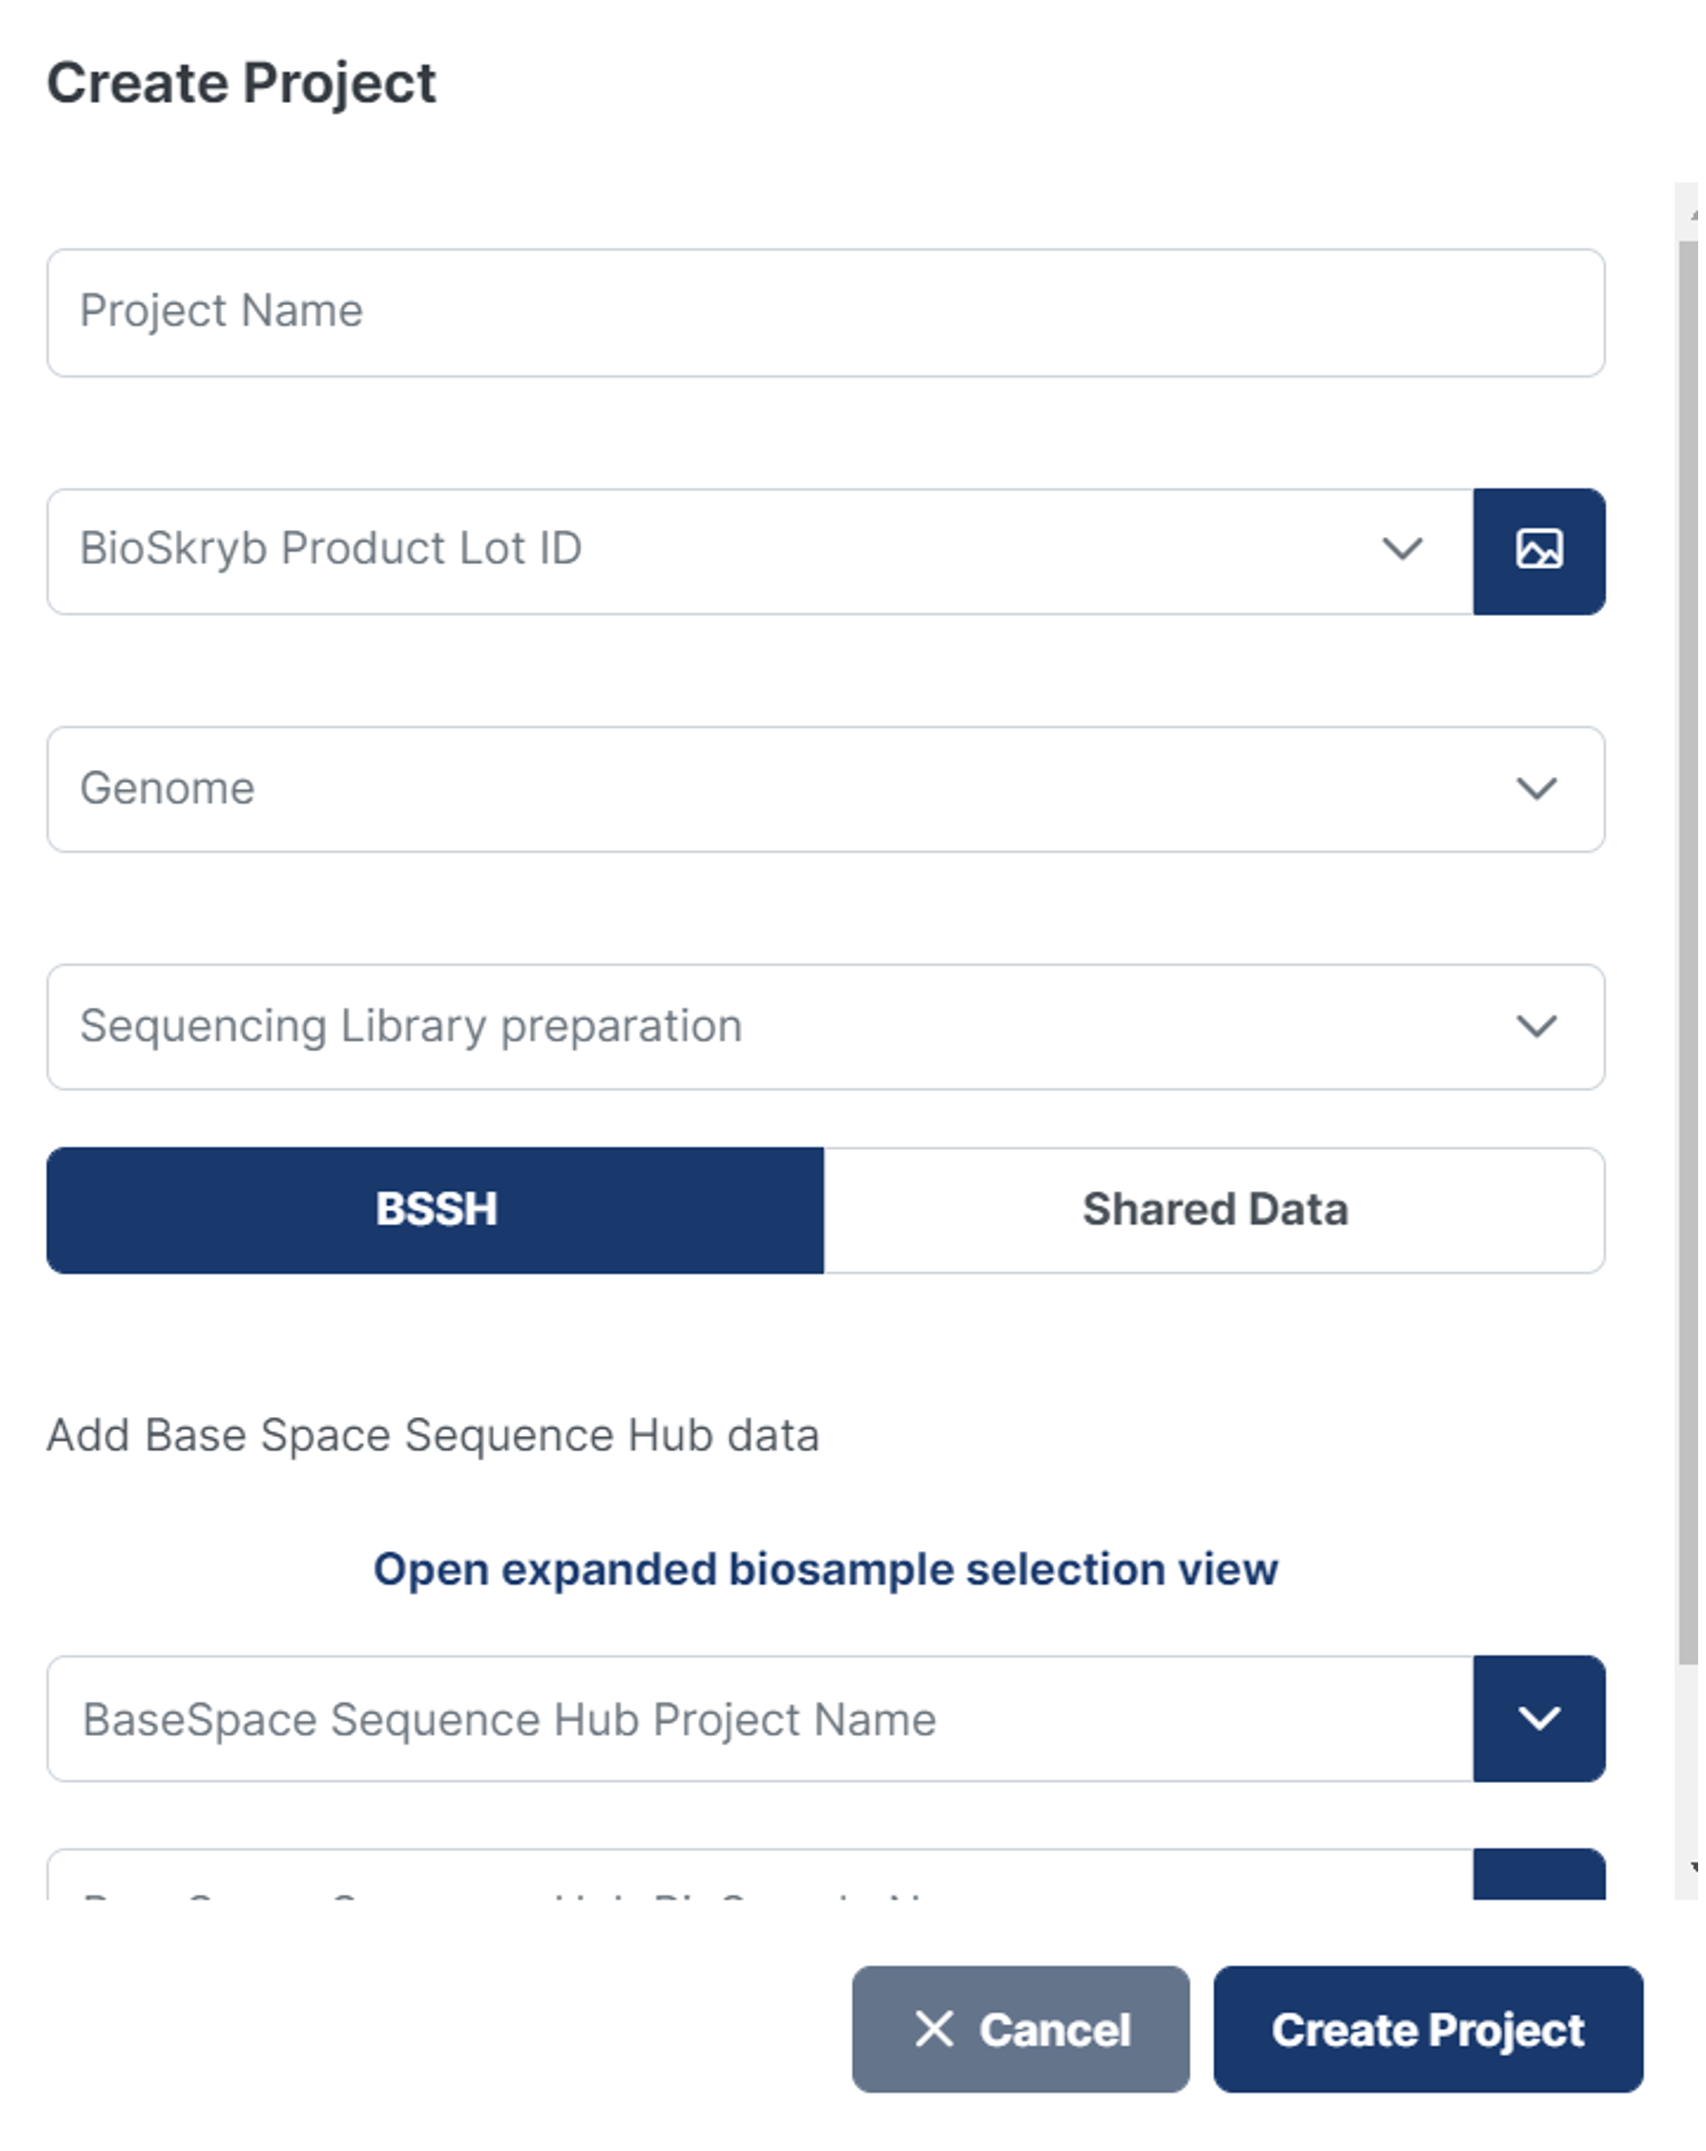
BaseSpace Hub Biosample Name - If no projects were selected, all of the available biosamples will be shown.
Note
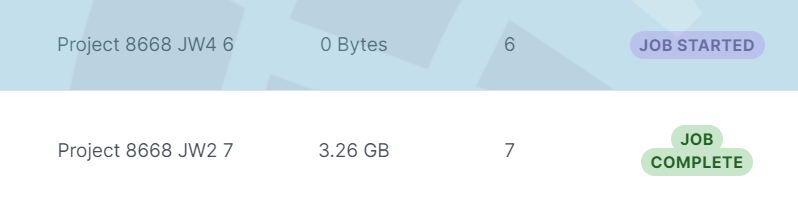
Clicking on create project will add the project to the data table. Upon creation, the projects status will be No Data. The status will change after a few seconds to Job Started, this indicates that the download process from BaseSpace Sequence Hub to the project specific s3 location has started. Once the download is finished, the status will change to Job Complete.
-
Once all inputs are selected, click on Create Project.
Evaluating Project Status#
-
You will then want to check the status of your project to make sure that all of your
fastqfiles have been downloaded successfully from the S3 bucket into Base Jumper. This will appear as soon as the projected is created. -
The status of your project will start out as Job Started and then when the download is complete it will change to Job complete. You will receive an email with the status of your project from when it is started and from when it is completed.
-
When the status of the project changes from Job Started to Job Complete, you are now ready to launch the pipeline for your project.
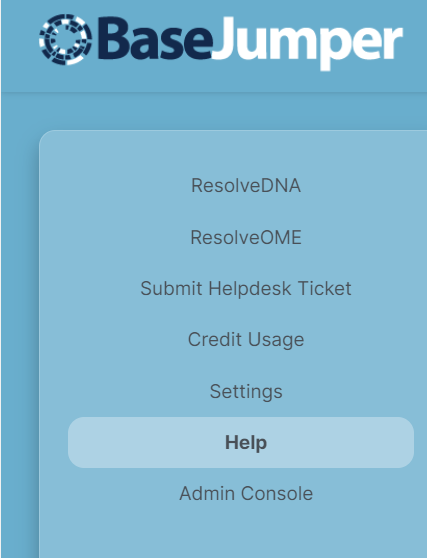
If you need further assistance, be sure to check out the Submit Help Desk and Help options in BaseJumper in the panel on the far left side of the page.