Data Import#
BaseJumper allows for the importation of FASTQ files.
File Naming Requirements#
For successful data importation, BaseJumper requires FASTQ files to adhere to a specific naming convention:
Paired-End Reads:
BIOSAMPLE-NAME_S1_L001_R1_001.fastq.gz
BIOSAMPLE-NAME_S1_L001_R2_001.fastq.gz
BaseJumper is designed to automatically merge data with the same biosample name during the import process, which is particularly useful for multi-lane data.
 Note:
When choosing a
Note:
When choosing a BIOSAMPLE-NAME, it is highly recommended to avoid _ , . , or any special characters.
Data Import Methods#
There are three primary methods for importing data into the BaseJumper Platform:
Importing Data from BaseSpace Sequence Hub (BSSH)#
BaseJumper has native support for the BaseSpace Sequence Hub, enabling programmatic interfacing via its REST API. Providing a security token with READ access from your BaseSpace Sequence Hub account enables BaseJumper to access the primary data directly. This security token can be included in the workspace settings of your user account, which will allow BaseJumper to stage the data directly to your workspace.
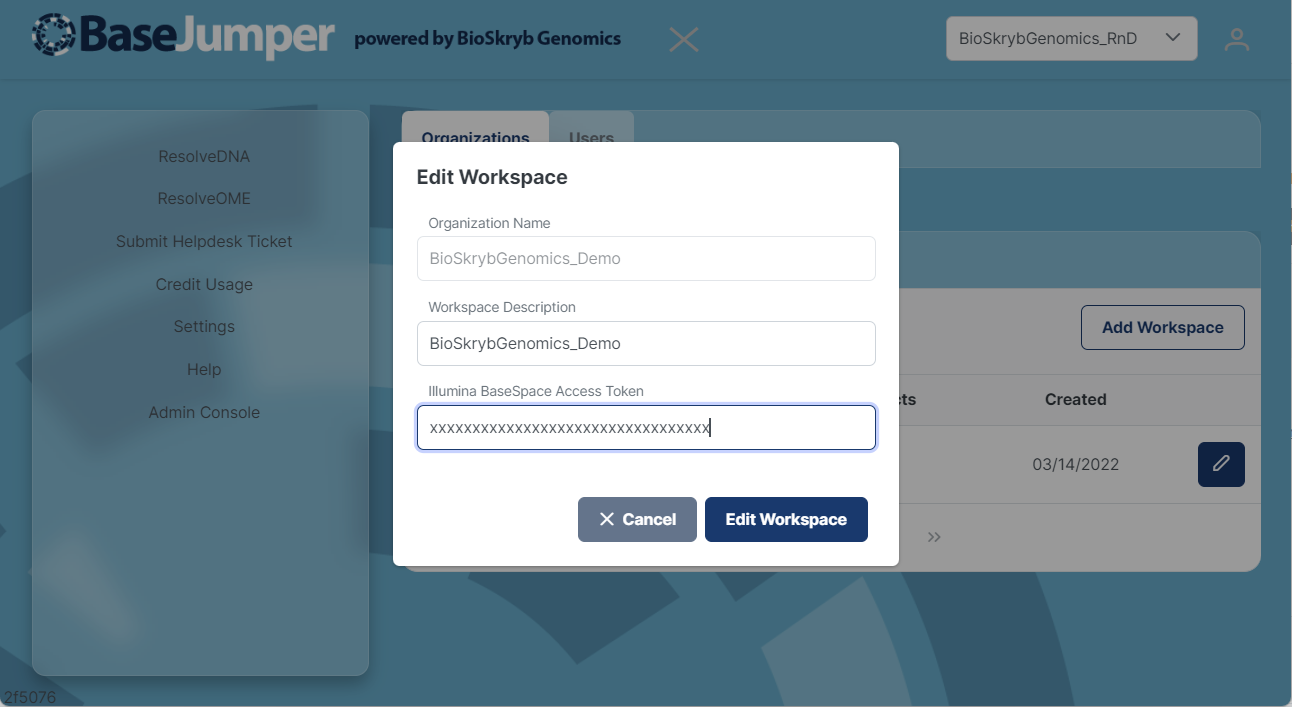
Obtaining a BSSH Access Token#
-
Log into BSSH:
-
Navigate to BaseSpace Sequence Hub.
-
Enter your credentials and log in.
-
-
Go to Apps:
- After logging in, find the "Apps" link at the top of the page and click on it.
-
Access the App Developer Portal:
- In the right-side menu or sidebar, locate the "App Developer Portal" link or button and select it.
-
Navigate to "My Apps":
- Within the App Developer Portal, click on the "My Apps" section.
-
Create a New Application:
-
Select the blue button titled "Create a new Application".
-
Complete the required fields (these can be placeholder details for testing purposes). Adhere to the provided instructions to finalize the app's creation.
-
-
Access Credentials:
- After your application is established, find the "Credentials" tab beneath or adjacent to the app's name and click on it.
-
Obtain Your Access Token:
- Within the "Your Access Token" section, an "Access Token" will be visible. Utilize this token for your API requests.
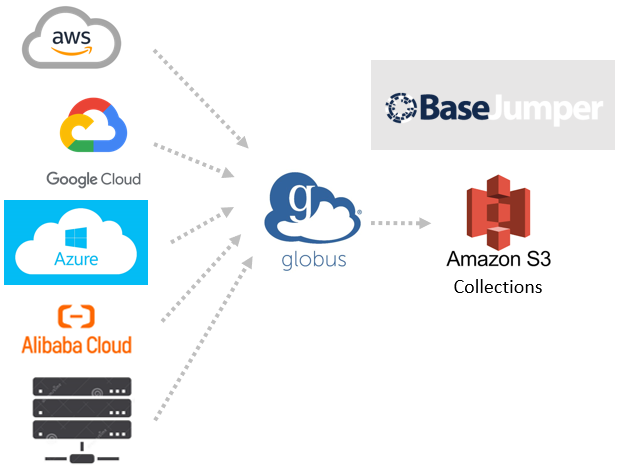
Importing Data from Globus#
In addition to the BaseSpace Sequence Hub, BaseJumper can natively import data from Globus, a widely recognized standard for data management and file transfers. Globus facilitates the transfer of data across various cloud providers and network storage systems. Many universities already have Globus set up. To learn more about Globus, please visit globus.org
Globus Transfer Guide & Quick Start
Account Creation
- If your institution uses Globus: Access their collections directly
- No institutional access: Install Globus Connect Personal to create your own endpoint
Accessing/Transfering Data Collections in Globus:
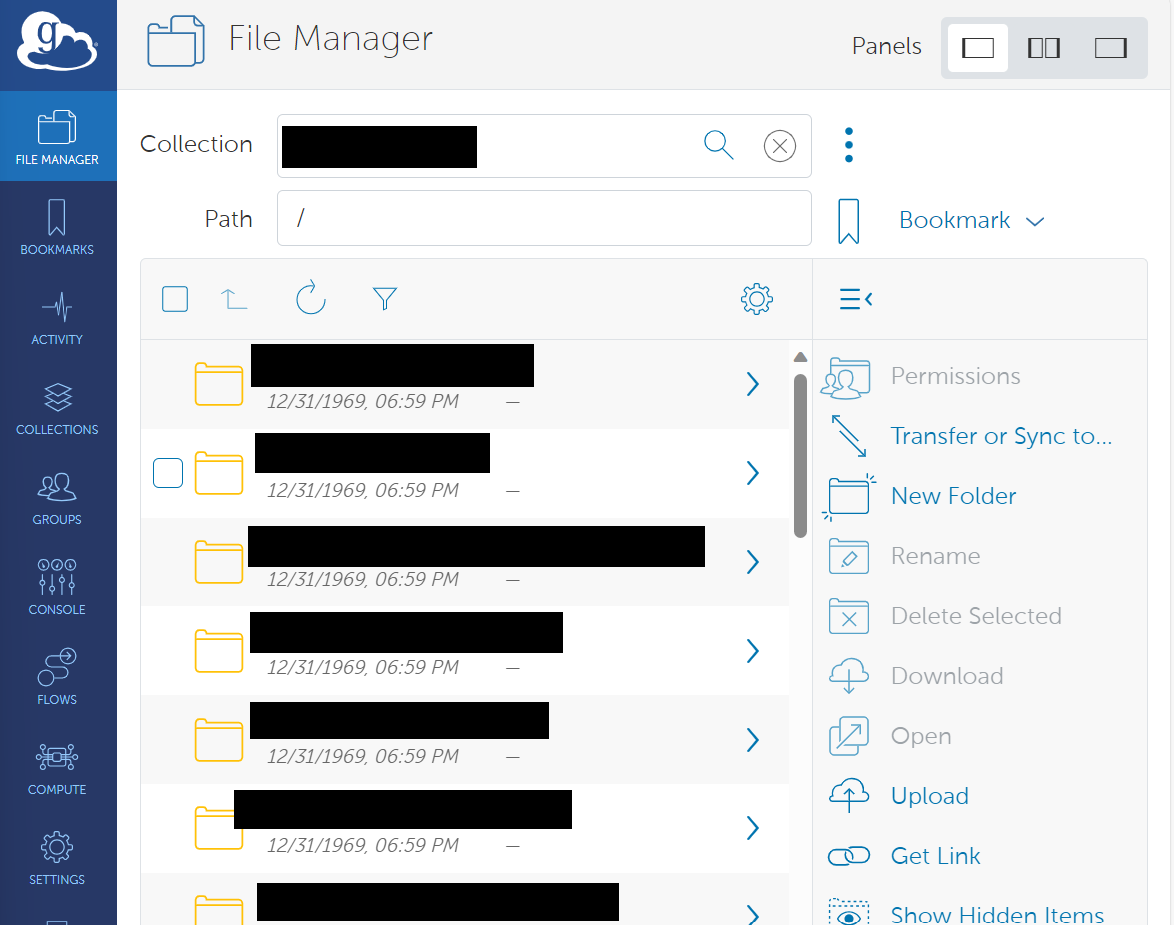
- To access BaseJumper Demo Data, log into Globus → Go to File Manager → Find "basejumper demo data" collection → Select files → Choose your destination → Click 'Start' to transfer
- Transfers run in background, email notifications provided, demo collections are read-only, but user have full access to their BaseJumper organization collections.
For detailed step-by-step instructions with screenshots: Globus Transfer Guide (PDF)
After importing the files to Globus, the s3 path can directly be connected to user's organization/workspace in BaseJumper.
Setting up the Globus Account#
Step 1: You will receive an email invitation to join a group.
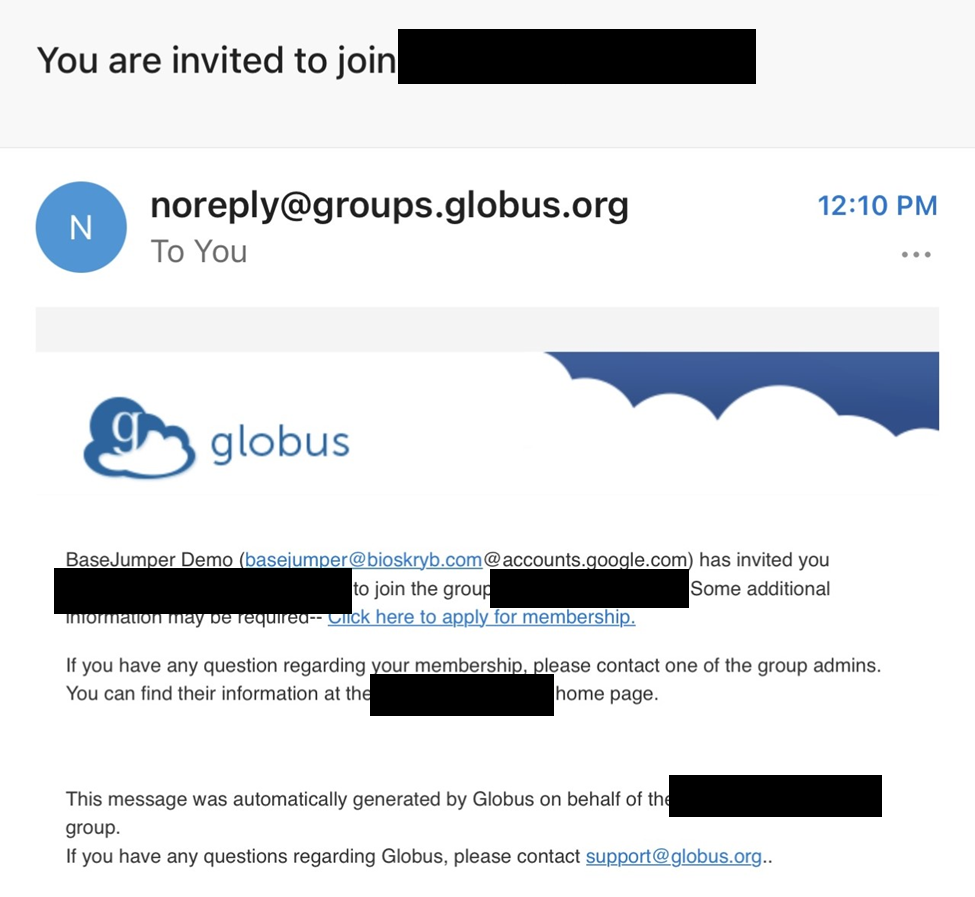
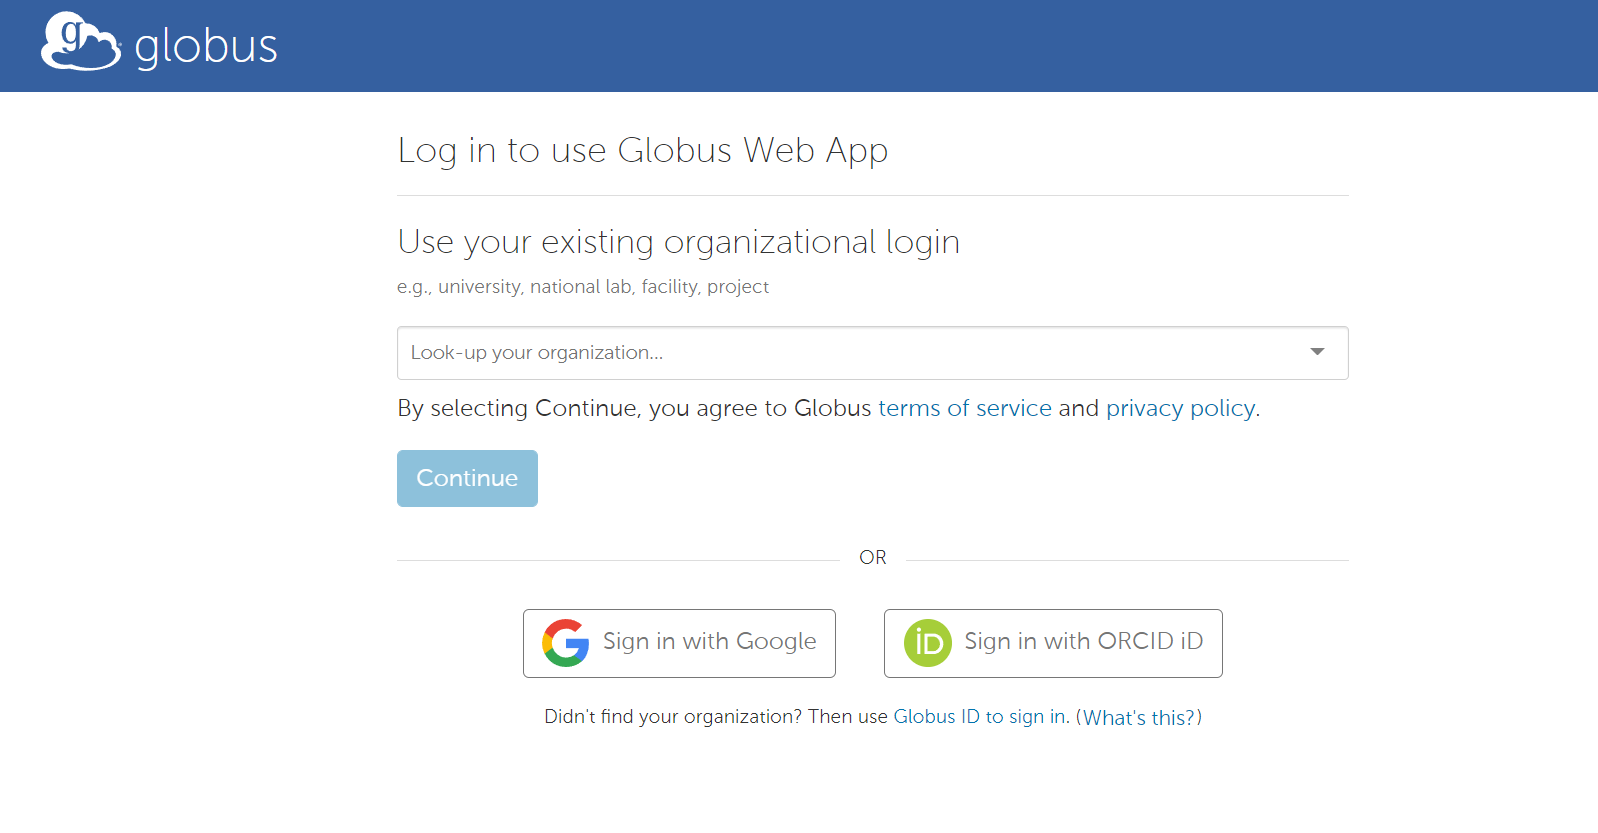
Step 2: Click on “Click here to apply for membership.” On the Globus login page, you can use Google or ORCID to create a new account, and then click "Continue".
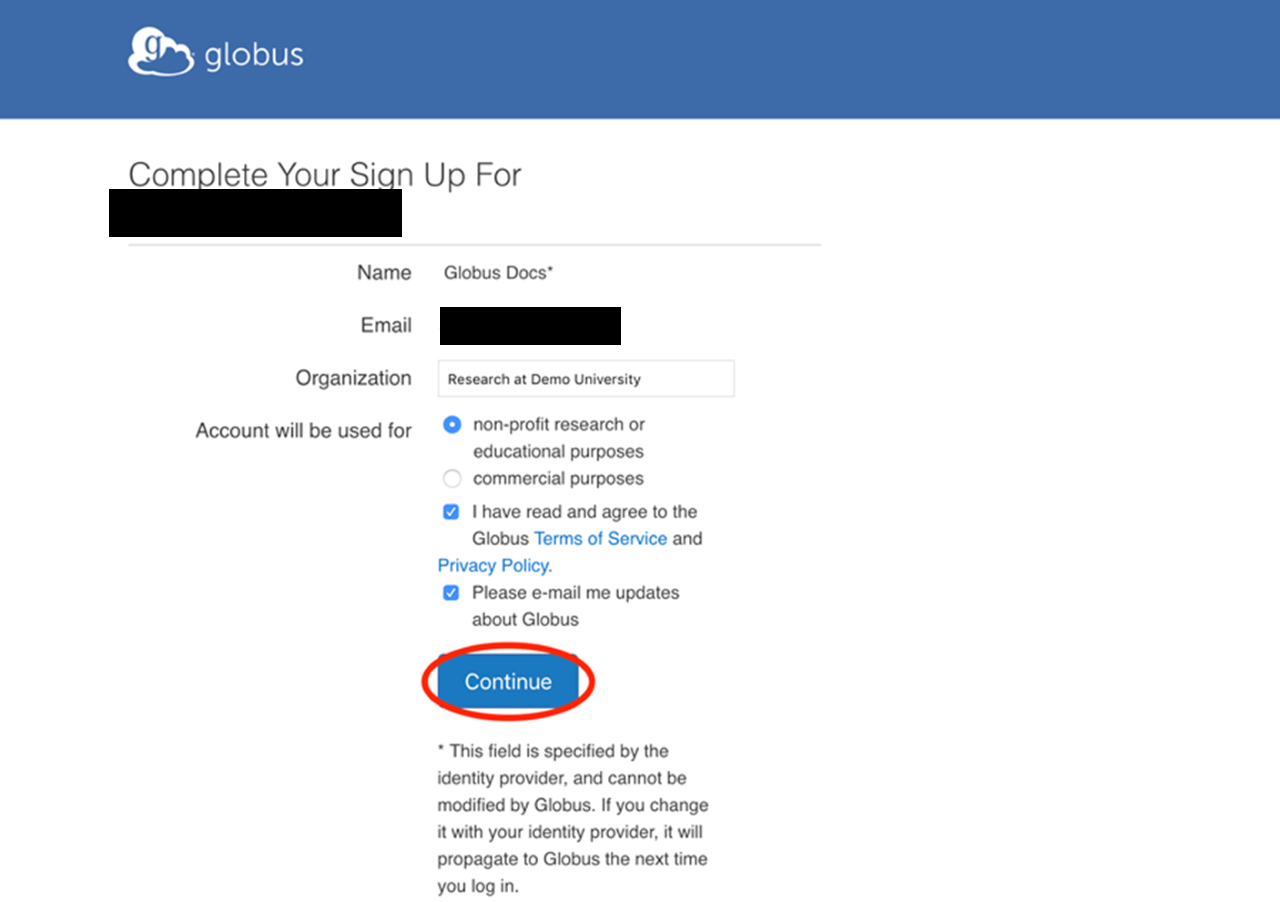
Step 3: You may be prompted to provide additional information such as your organization and whether or not Globus will be used for commercial purposes. Complete the form and click "Continue".
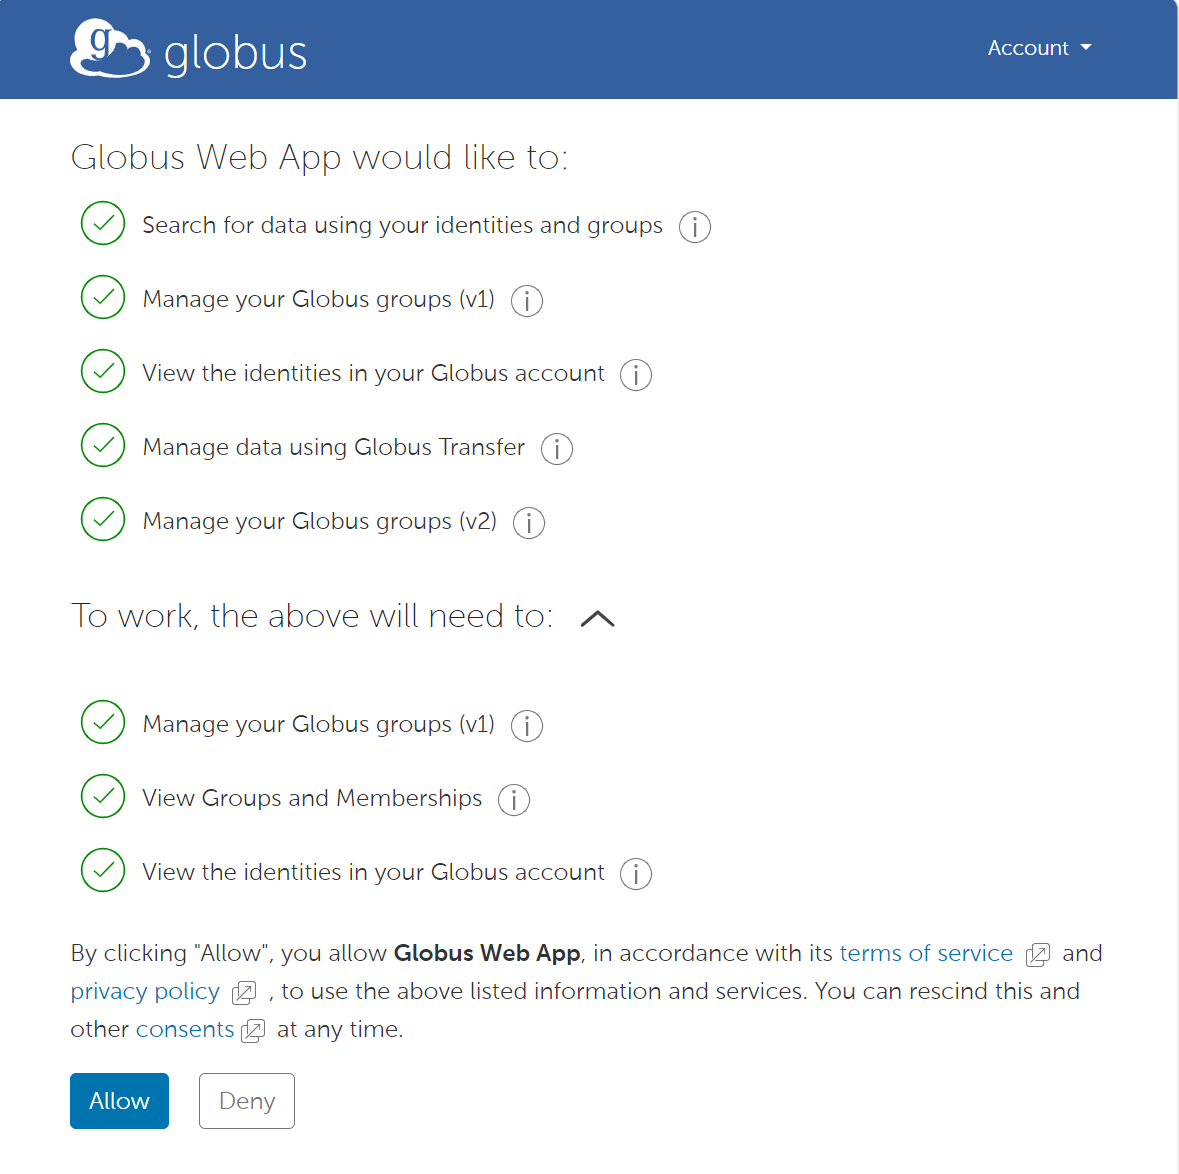
Step 4: Next, you must grant Globus the required permissions to use your identity to access information and perform actions (like file transfers) on your behalf.
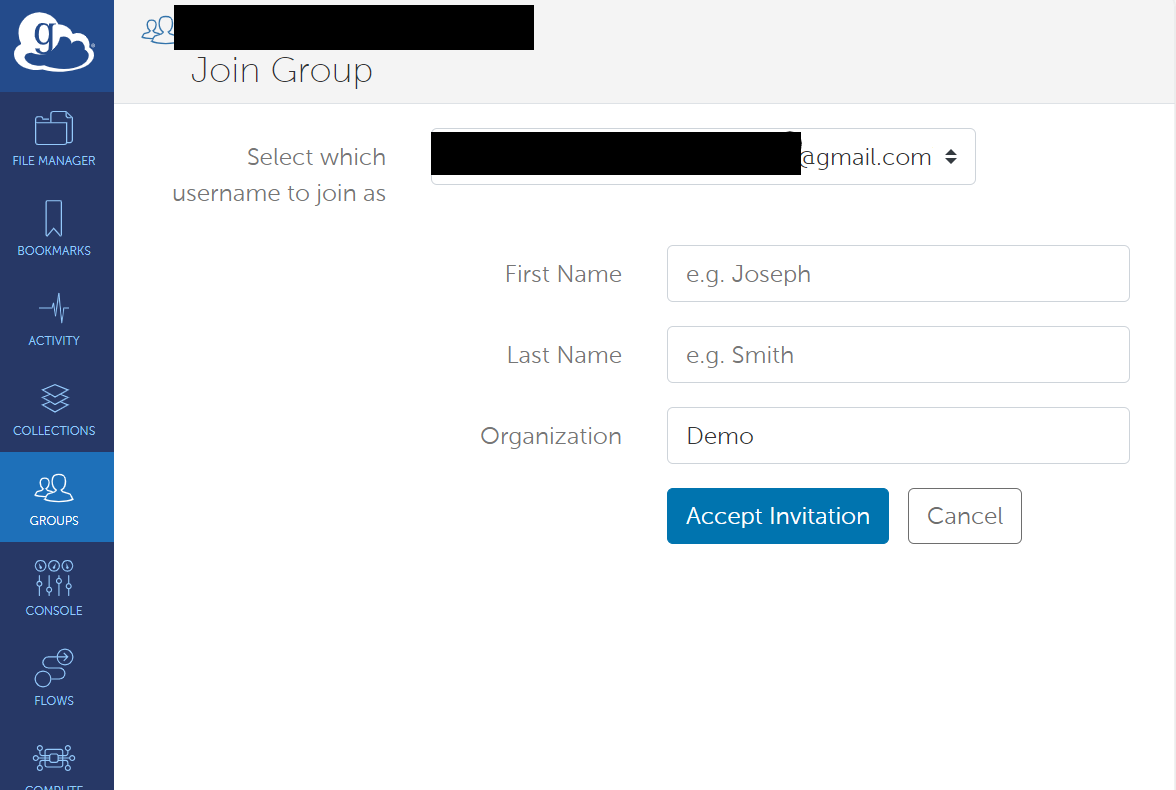
Step 5: Following this, you will be prompted to enter your name and organization information before accepting the Globus group invitation. Enter your information and click 'Accept Invitation'.
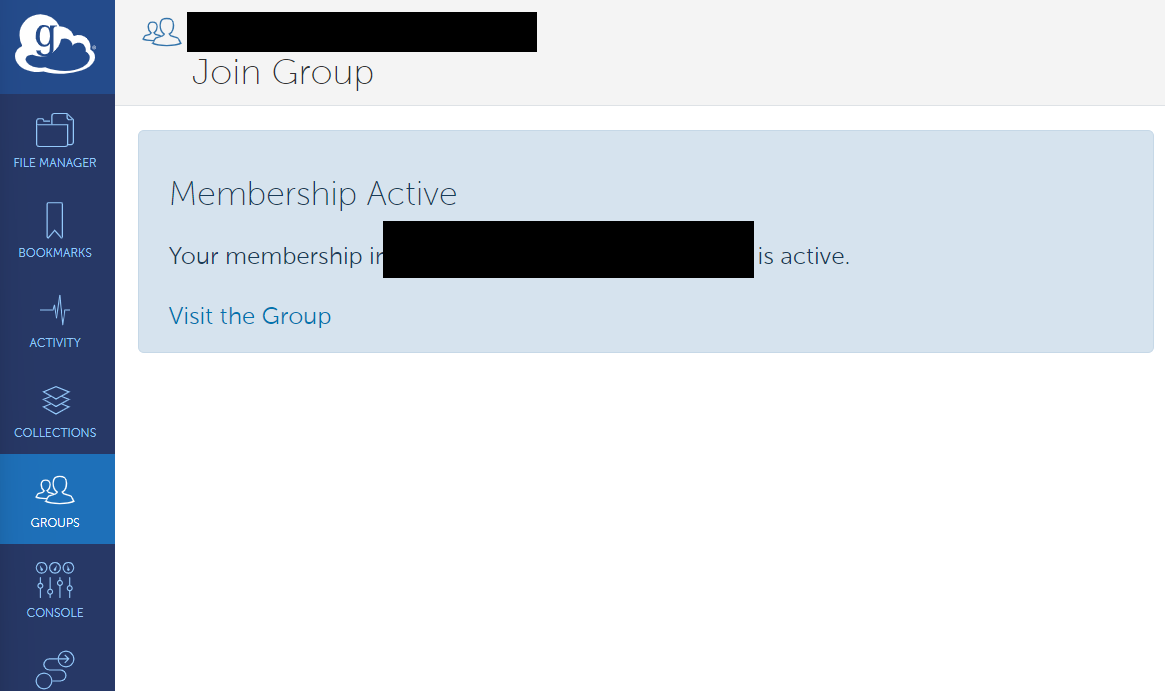
Step 6: A message will appear stating 'Membership Active'. You can now click 'Visit the Group' to access the group overview.
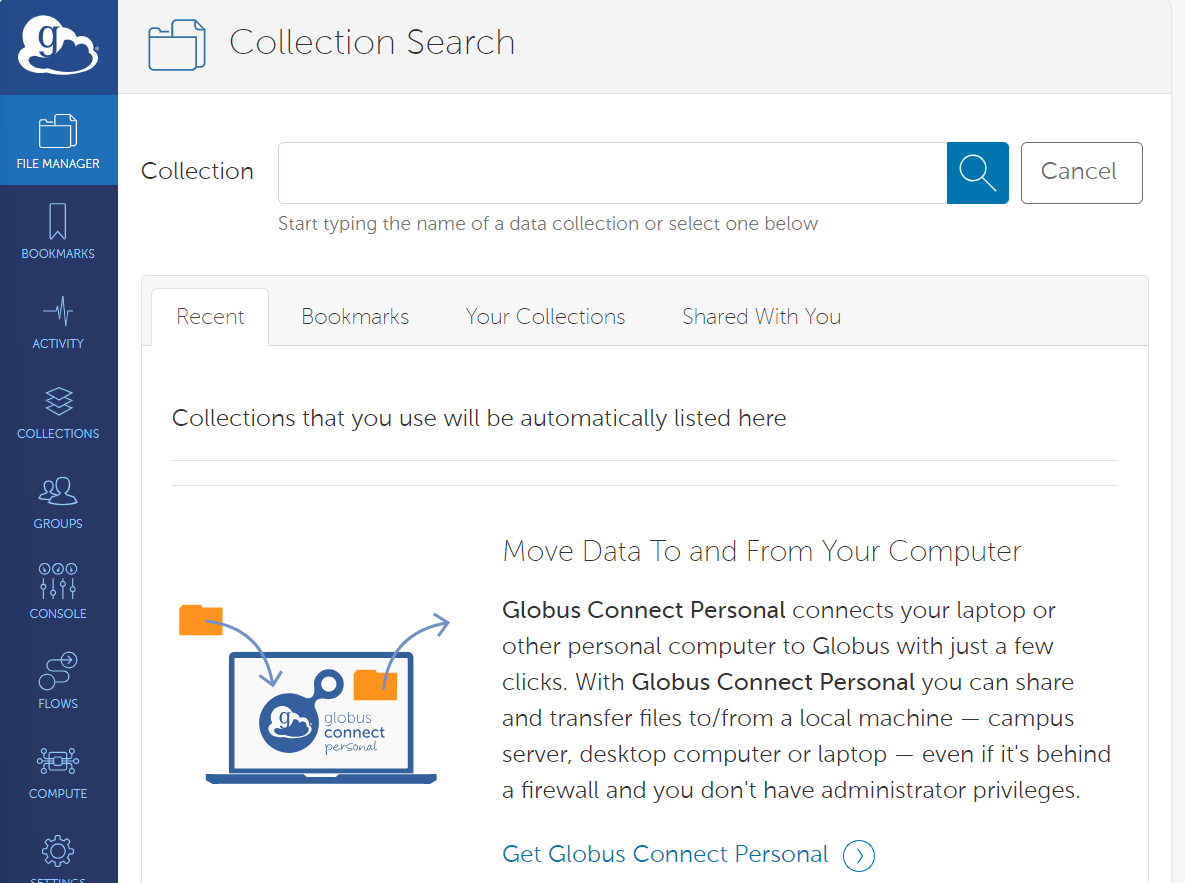
Step 7: To access data/files managed by your group, you’ll begin at the File Manager. Note that the first time you use the File Manager, all fields will be blank.

Step 8: Click in the Collection field at the top of the File Manager page, it will bring you to a new page titled 'Collection Search'.
Step 9: To see your group's collection, click “Shared With You”.
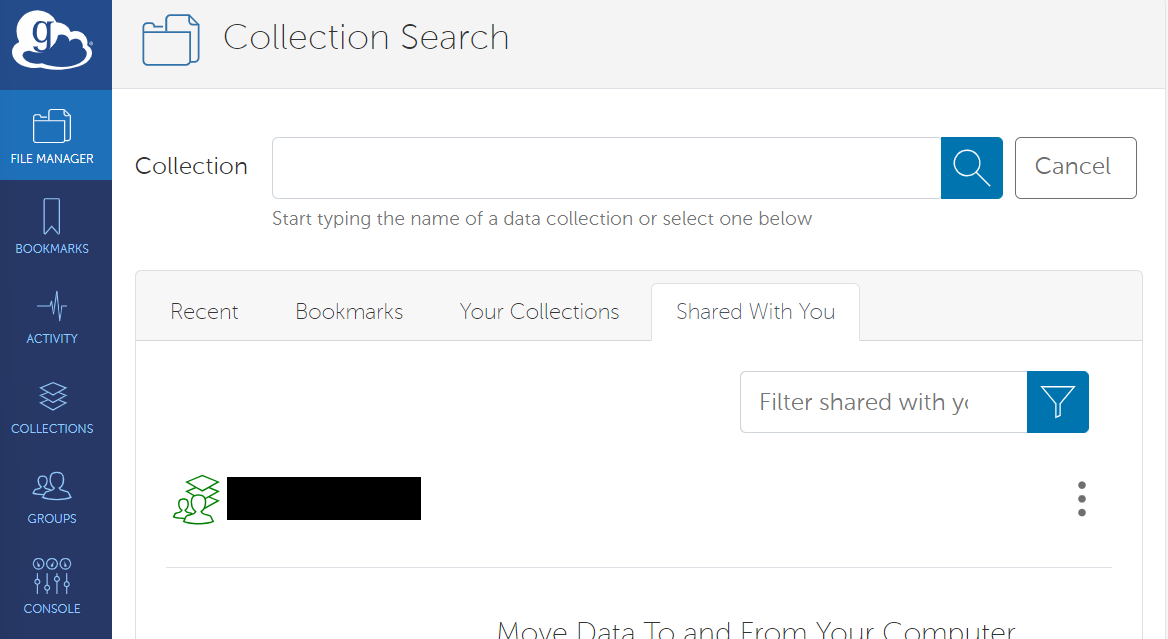
Step 10: Click on the group name to access all files managed by your group.
Importing Data into Globus#
There are two primary methods for importing data into Globus:
Installation and Setup of Globus Personal Connect#
Purpose: Enables personal computers or devices to function as accessible endpoints within the Globus ecosystem.
Procedure:
- Install Globus Personal Connect.
- Use its graphical interface to designate your machine as an endpoint.
- Marked directories on your device are then available for data transfers.
Benefits: Offers a graphical interface for ease of setup, making it user-friendly for those who prefer visual interactions over command-line operations.
Installation and Setup of Globus Command Line Interface (CLI)#
Purpose: A command-line interface allowing users to manage and initiate data transfers within the Globus service.
Procedure:
- Install and authenticate using the Globus CLI.
- Use terminal commands to control and manage data transfers.
Benefits: Provides a hands-on approach for those comfortable with terminal commands. Ideal for scripting, automating tasks, and integrating Globus operations into existing workflows.
If you wish to utilize the Globus transfer tools from the command line, you can download the Globus Command Line Interface (CLI). It is available as a Python package. Here are the steps to install and set it up:
-
Install pipx, a package manager for Python:
1
2
python3 -m pip install --user pipx python3 -m pip install --upgrade pip -
Install and upgrade Globus CLI using pipx:
1
2
pipx install globus-cli pipx upgrade globus-cli -
Log in to Globus:
You will be given a link to authenticate Globus and provided an authorization code.1globus loginYou have successfully logged in to the Globus CLI!
You can check your primary identity with
1globus whoamiFor information on which of your identities are in session use
1globus session showLogout of the Globus CLI with
1globus logout -
Search for the Guest Group Name:
1globus endpoint search --filter-scope=all "Globus Group Name"The output should look something like this:
1
2
ID | Owner | Display Name ------------------------------------ | ------------------------------------------- | ------------------- -
Search for the Guest Collection
1globus collection show "ID"
Installation and Setup of Globus Personal Connect
- Download and extract the latest version of Globus Personal Connect:
1
2
3
wget https://downloads.globus.org/globus-connect-personal/linux/stable/globusconnectpersonal-latest.tgz tar -xzf globusconnectpersonal-latest.tgz cd globusconnectpersonal-3.2.2 -
Run the Globus Personal Connect:
1./globusconnectpersonal- During this process, you will be asked to create an endpoint.
- Clear any old endpoints if you have any (delete the ~/.globusonline/).
-
Navigate to the Globus Personal Connect directory and start it:
1
2
cd ~/environment/globusconnectpersonal-3.2.2
./globusconnectpersonal -start
Transferring Files To Globus
After setting up Globus CLI and Globus Personal Connect, you can now transfer files.
Here is an example of transferring a file input.txt from your local machine to your Globus endpoint:
1 | |
In this command, 0cf6b284-fbc1-11ed-9bbb-c9bb788c490e is the endpoint ID of your local machine and ec60609b-ed16-4787-bd32-946354639508 is the endpoint ID of "Globus Group Name". The directory paths after the IDs specify the source directory to be transferred and the destination directory where the data will be saved.
1 2 3 | |
In this command, 71de91d8-ad5d-4023-8de1-b2d7334a0345 is the endpoint ID of the "Globus Guest Collection" and 83fc7510-42a4-11ee-a06c-eb83daae1adf is the endpoint ID of your local machine. The directory paths after the IDs specify the source directory to be transferred and the destination directory where the data will be saved.
Importing Data via Secure File Transfer Protocol (sFTP)#
To import data using the secure file transfer protocol (sFTP), follow the steps below:
-
Create the private key by retrieving the "Private Key Mac/Linux" field from Keeper.
- An email containing a link to the private key file will be sent to your inbox through our zero-trust sharing tool, Keeper.
-
Navigate to the provided link and copy the line corresponding to the "Private Key Mac/Linux" field in Keeper.
-
Open the terminal. If the terminal is already open, you can use the same terminal window. Type the following command:
1nano bioskrybkey.pem -
Paste the line from Keeper's "Private Key Mac/Linux" field into the terminal window. Save the file by pressing the 'Command + X' keyboard keys.
-
Change the permissions of the file by typing the following command:
1chmod 600 bioskrybkey.pem -
Proceed to sFTP into our Bioskryb server. Use the command below, replacing "username" with the username provided in Keeper:
1sftp -i ~/bioskrybkey.pem -o ServerAliveInterval=9999 username@sftp.bioskryb.com -
You will receive a warning prompt to import the key type. Type 'yes' and press Enter.
-
You will then be prompted to enter the password, which can be found in Keeper. Please remember the password or store it in a password manager to adhere to our security standards.
The final result should resemble the following:
1
2
3
4
5
6
sftp -i ~/bioskrybkey.pem -o ServerAliveInterval=9999 username@sftp.bioskryb.com
Warning: Permanently added the RSA host key for IP address '3.223.137.129' to the list of known hosts.
Welcome to the BioSkryb sftp upload server.
Enter passphrase for key '/home/ubuntu/bioskrybkey.pem':
Connected to sftp.bioskryb.com.
sftp>